semi-non-updates

I don't usually like to write "I haven't actually accomplished anything, here are some pictures of nothing" posts, rather than waiting for the finished product and documenting every step along the way.  (Then I remember that I forgot to take pictures of almost all said steps.)  I do seem to like waiting an unduly long time between posts.  Connection...? 

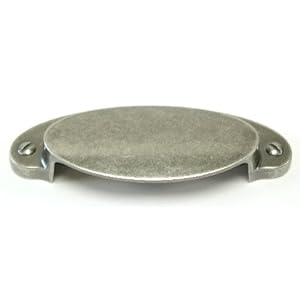
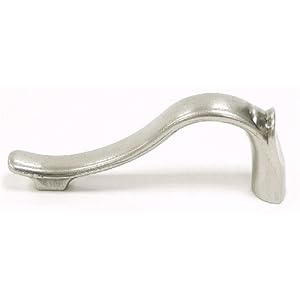
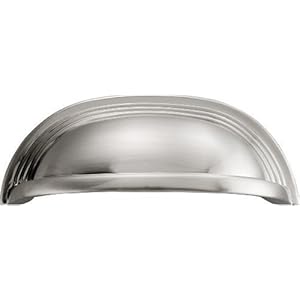
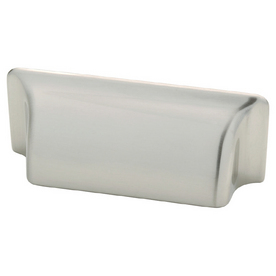
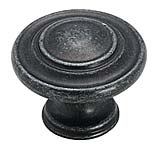
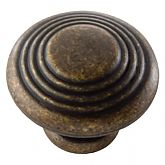
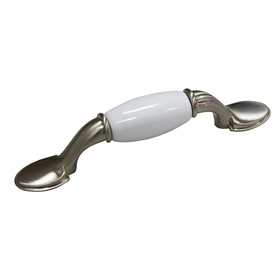
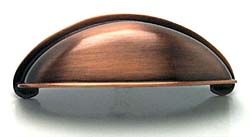
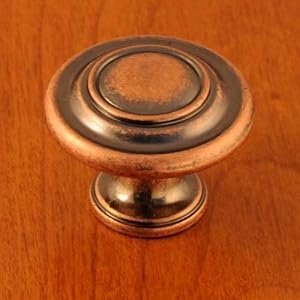
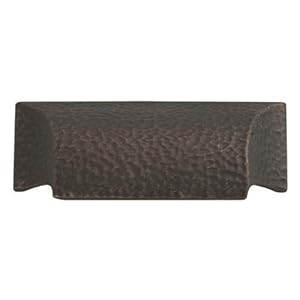
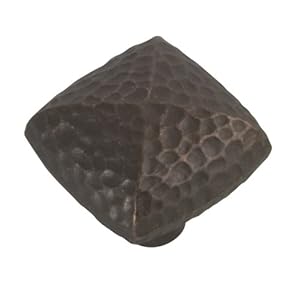
But today, I figured I would just offer a wee pop-in and an update.  First of all, my drawer pulls arrived yesterday and they are lovely and I am delighted.  Also in the box was my wee, tiny block plane.  It's so little!  Normal block planes are about a foot long; this one is six inches.  Its blade is just 1 3/8" across, but for evening out the edges of cabinet doors and joints, that's absolutely perfect.  And it was quite inexpensive.  After several days of hacking away with a flat file, grinding up uneven bits with a hacksaw blade, and abusing my little electric sander on jobs too big for it, using the itty plane is like waving a wand.  IT'S MAGIC. 

So I made some progress on cabinet #3.  (You've seen cabinet #1.  And I promise that you will soon see cabinet #2.  The last adjustment it needs is to have one of its doors planed and then repainted, which I failed to do last night only because I was too lazy to take the door off the hinges.  Tonight, though, it's getting planed.)  And after cabinet #2, I will show you the finished cabinet #3.  But first, the progress.  As you may remember, I was trying to make a hood cover like this one:


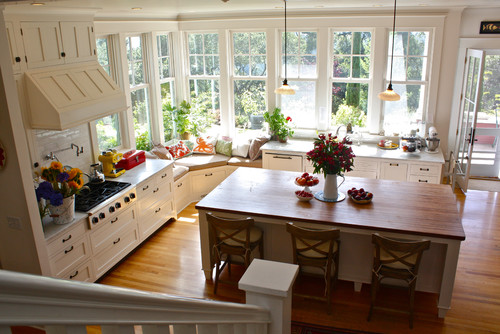
Except that this one has another cabinet to its left, and mine will go straight back to the wall.  So I drew up some measurements, and I cut my first pieces:


(It occurs to me that someone might actually want to do this themselves, rather than merely shake their head, as I assume people do at most of my projects.  I believe these cost $800 or so if you have one made.  Even counting the depletion of supplies like wood glue and caulk, I don't think this will have cost me $30.  So I will take this interlude to add some technical information.) 

Technical information: standard countertop height is 36", and most basic range hoods' manufacturers say they want to be a maximum of 24" from the stovetop (which is also about 36" off the ground).  The standard distance between the countertop and the bottom of the upper cabinets is 18", and I think the hood should be distinctly higher, so I think 24", period, is the number to shoot for.  I also got it in my head that 18" would be an attractive height for the entire hood cover (that's the wooden part I'm making, not the appliance part I bought at the store), which, given the height of my upper cabinets, meant about 25" between the hood and the stove.  I decided that was acceptable.  Thus, the piece in the photo above is 18" tall.  It's about 41" wide, because that is the width of the cabinet I am attaching it to, and I want them to line up.  Obviously, it has to be at least as wide as the actual vent hood (appliance), but mine is about 30", so I'm ignoring it for purposes of this measurement.  The depth at the top is 11 1/4", because that is the depth of the upper cabinet above (less the doors, which are 3/4" thick).  I decided it should emerge from behind the doors, rather than being flush with them - mostly because the doors are uneven at the bottom, and I thought they would collide.  If you have semi-flush-mount doors, however (which is most typical), you should make the top of the hood cover the same depth as the cabinet BOX (most likely 12").  The depth of my hood cover at the bottom is 20", because the vent hood is 18 3/4" deep and I wanted to be able to reach between the cover and the hood to get at the controls.  Of course, the controls stick out further, and I should have made it 21" deep.  (I can fix this, but if you're making one, you might as well get it right the first time.)  Finally, the strip across the bottom is 4.5" high, because that is the height I thought looked good.  End technical information. 

Next I made a piece to lay across the front, but I forgot to take a picture of it before I nailed it to the piece above.  I think you can figure out what it looked like, though.  There's a single piece of plywood on the bottom, with all those strips nailed onto it.  By the way, all my pieces are 3/16" pine-veneer sanded plywood.  (I bought a 4' x 8' piece, but I have used it for multiple projects - you don't need that much.)  So then I attached this second piece to the first piece:


I apologize for the quality of this picture.  I can only get decent pictures in full sun with my BB (and we have two broken digital cameras lying around.  Sigh).  Here it is from the side, to give a better idea of the shape:


Before the last two pictures were taken, I had also caulked and planed.  If the pictures were better, you could tell that that results still weren't perfect.  After the first coat of paint, though, I realized that the results still looked pretty good - not as kludge-y as I had feared.  (Of course, the paint job itself is garbage, because apparently I have all sorts of debris in the paint, so I will be sanding carefully.  Fortunately that can of paint is pretty much empty and I just bought a new one.) 

It still needs strips added that will attach it to the upper cabinet, a bit of sanding, attaching to the cabinet (obviously), the addition of trim (mostly to conceal its imperfections, with an incidental decorative benefit [I hope]), and a couple more coats of paint.  Oh, and I have to install the actual vent :). 

Wish my luck!  Final pictures coming soon (I really hope)! 

Soccer

What does fall mean to you?  Well, to me it means "Busy" with a capital "B".  One of the reasons for that busyness is Soccer. With practice and games and a husband that coaches two teams, our Saturdays and a few of our weeknights are pretty much booked up until the end of November.  


Nash (above) is super competitive. Almost so much that he cannot even enjoy the game for fear he might lose.  He is a good little soccer player when he is not melting down about a goal scored from the opposite team or an injury.
Atley (below)  has fun with whatever he is doing.  We wish he was a little more competitive. He has a hard time not socializing with the other team while he plays. 
Coach Butler (bottom)  is very patient, although he likes to complain about his duties as coach, but it is only because he is too macho to admit he is loving every minute of it.


hilarity

If you haven't heard this, I think you're going to need to:


OK, granted, it won't be that funny to those who weren't raised Christian (and specifically Catholic).  And, sure, one or two of these songs have some poignancy for those of us who were raised with them (singing On Eagles' Wings at a memorial service when we were only teenagers, for example), but in general I can say with confidence that Marty Haugen and his ilk were an aesthetic blight without which the world would be a better place now.  (Also, the new lyrics to Eagles' Wings are just awesome.  Maybe even spiritually instructive.)

Oh, by the way.  I pondered my cabinet pull options and your wise comments.  I decided that the black and the weathered copper were too dark to read well against the slate blue lower cabinets.  (Sad.)  And the bright copper just didn't look like it would work.  And the brass I loved (I even found it for a better price).  But aged brass isn't anywhere else in the kitchen.  So in the end...the top pulls are chrome, on white cabinets; it makes sense for the lower pulls to be a darker silver, on the slate blue cabinets.  So I chose something that I didn't even list (oops!):


Partly because it qualifies for Amazon's free shipping, and I needed to put together an order over $25 so I could get my mini block plane, which I will need to finish fixing my wonky doors.  (Ship swiftly, Amazon!)  Today: borrow saw from friend and start cutting stock for the vent-hood-cover.  Anyway I could have that done by the end of next weekend??

Also, as soon as I had ordered the above pulls, I saw something else (isn't internet marketing wonderful?):


I know it doesn't look like the same color, but it is also called pewter and it is also manufactured by Top Knobs, so I'm thinking it probably is.  Thus, maybe I should get those for the lower-cabinet doors, since I just bought the items for the drawers.  They'd match in color, and the lower-door handles would have a certain similarity to the upper-door handles.  (They're $5.23, but I only need maybe two of them.)  Alternatively, I could stick with these for the doors:


Hope everyone is having a great weekend!

Fall Fishing

The kids went to a Fishing Birthday Party last week. I know, what an ingenius idea for a party-worms, fish and water, every little boys dream. The leaves are just beginning to change and the mornings are cool and the afternoons warm. It was a lovely day. 


more design decisions for you to help with

If you thought the lighting questions were difficult, you have no idea.  Seriously. 

So as you know I have installed one upper cabinet, and will eventually be showing you a second.  They each had their original latch.  Which looks like this:


So clearly I am not going to change those out.  Then, in an architectural salvage trip the other weekend, I stumbled on matching handles.  They don't have the push-button thing (which is connected to a latch that holds the door closed), which is fine because I figured I would put them on the lower cabinet doors, which are of modern construction and don't require a latch (just a handle).  Of course, being an idiot, I bought one.  This was as many as I could imagine needing for the lower cabinets.  (And now I can easily imagine needing two.  And the salvage place is quite a ways from home.) 

So, I still need hardware for my lower drawers.  I have looked at, I don't know, conservative estimate - 10,000 drawer pulls now.  Again, part of my difficulty is that I can't decide what I want.  One avenue is to assume that I will put a handle in the above style on each of the lower-cabinet doors.  Then I would need to get coordinating hardware for the lower-cabinet drawers.  (With me so far?) 

Turns out that it is not that easy to find pulls that in any way coordinate with the hardware I'm starting with.  (And I don't generally like Art Deco anyway, which doesn't help.)  But I have identified two candidates that may qualify - you tell me whether you agree.  This bin pull has ridges:


But then again, it is $5.43 on Amazon.  And I was trying to make an absolute cap of $5/pull; ideally $3 or $4.  This pull is just $3.97 at Lowe's.  It doesn't match as literally (no stripes), but it strikes me as compatible.  What do you think? 


At some point it occurred to me that my upper cabinets are/will be a different color and a different style than the lowers.  I could do a different style for the lowers!  People do this.  (These people, for example.)  Which in some ways solves a dilemma - I can consider some other things I like - but of course also creates a major dilemma: I can consider some other things I like.  That's a lot of things. 

For example, I am really partial to the antique pewter/antique silver look.  For the lower cabinets, I could use these cup pulls ($33.99 for 10 at Overstock):


And these door knobs ($3.08 each here):


I also really, really like black.  Not sure why; I just think it's lovely.  So, for example, I could use these bin pulls (though they're $5.99 at Home Depot):


(There's a matching pull for $2.99.)  And I have a soft spot for the wrought iron.  So I could also go with these ($3.51 at the Hardware Hut):


And, let's see, for the doors ($3.72):


(Uh-oh.)

Honestly, I kind of adore antique brass.  These are particularly awesome ($4.91 at Lowe's):


And I'd need door knobs ($4.07 at the Hardware Hut):


And of course anything that looks really antique catches my eye.  I could use these for the doors and the drawers (vertical for doors, horizontal for drawers).  They're $3.27 at Lowe's:


And as you know, I've been having a ridiculous soft spot for copper.  So...these are nice ($3.91 at the Hardware Hut:


They sell matching knobs, but I prefer these ($1.69 on Amazon):


These aged-copper ones are nice too ($2.50 each on Amazon):


(And they have matching cabinet door knobs, $2.15 each.)


I think I need some help here.

cranky with Ikea

This is not a phrase I have occasion to utter (in writing or orally) very often. 

Finding an unoccupied Sunday afternoon at my disposal (having attended an early Mass and received my required blessing as a catechist, spent ninety minutes endeavoring neither to instill nor condone heresy in my remedial confirmandi, and discovered that my husband had vanished for football-related pursuits when I returned home), I folded some laundry, baked a pan of Stouffer's lasagna (truly, now that I have a working oven, I am a gourmande!), and departed for Ikea. 

Before that, of course, I engaged in some soul-searching as to whether it were appropriate to do so; had I not just read to eight comatose adolescents that not even my "male or female slave" may do any work upon the Sabbath?  I debate this matter often.  While the bulk of my home improvement projects are performed on Saturdays, I always do something on Sunday, even if it's only folding laundry or grocery shopping; and sometimes it's a good bit of building something.  And it's not as though I take the rest of the week for leisure and work Sunday; I try to knock out an hour on my projects every night.  I do not do any paid work on Sunday, which is really the bulk of my "work," even if household chores are actually more menial.  And there is a fair argument that the kitchen renovation is my hobby (= leisure).  And Ikea is clearly a treat. 

So, as I was saying, I went to Ikea. 

There, I spent an amount of money that seriously disturbs me to spend all at once, even if I have thought the matter out carefully beforehand (I had).  Never mind that I know each of these items is at a rock-bottom price for a thing of its kind.  It still bothers me.  Anyway, I bought:

My countertops!  I have been planning on butcher block and probably Ikea (can't beat the prices), but finally the other week I settled on the thicker ones, and realized that I really preferred the oak.  Because it's oak, and it's beautiful, and it already has eased edges (which means I don't need to borrow a router from anybody.  I already take on plenty of carpentry, and I am well aware that the less I have to do, the less I can screw up). 

And I bought curtains for the living room.  It's the only room for which I'd not yet found curtains (other than the upstairs hallway, which suddenly became a small study and now, in my view, needs floral curtains.  That I have not yet found for an acceptable price).  I had been waiting partly because there's nothing good and partly because I frankly had no idea (or rather, over fifty ideas) of what I wanted in the first place and partly because I need six panels and that can really add up.  And then I found these and was sort of stunned that they were Ikea, because they don't look way-too-modern to me at all, and they finally got them back in stock, and they look perfect in person (haven't hung them up just yet), so I think that was $90 well spent.  (Deep breaths.)  See, they're pretty:

OK, well, you can't even tell.  It doesn't matter.  There's also two ways to hang them on the rod (bunched, as shown, or with fake pleats).  I think I'm going to go with the pleats.  I may even remember to take a picture.  The fabric has a subtle pattern that I am convinced is sufficiently formal for the living room without being too fussy - check it out

Finally, I have recently been up to more cabinetry.  No pictures yet - but soon.  This is the project for which I took the third door from my great cabinet caper, cut it in half to make two smaller doors, and built a cabinet around it.  (I have actually done all this.  Down to matching the trim on the original cabinet.)  Of course cabinet-making is more complicated than it looks to a silly amateur like me, and I screwed up the set of the doors in a way that still seems to me to defy the laws of physics, but which would probably be incredibly obvious to anybody competent.  I am convinced I can fix the problem with the proper application of a saw.  Will let you know how that turns out. 

ANYWAY, the new cabinet hangs above the stove.  (Yes!  It's already up there!  With its wonky doors!)  On the cabinet hangs the pretty copper light.  (It's really VERY pretty.)  I wired the new light to the wiring for the old (and hideous) fluorescent light, and wired the whole thing back to the wall.  I don't know whether it works yet, because we are not throwing the breaker until I ALSO wire it to the new hood, having taken the old hood off the wiring.  I need to do this soon, because my next cabinet-building project (and therefore the next step in the kitchen remodel that WILL be done by Christmas) is building a stove hood cover. 

I will be happy to share my FULL thoughts on stove hoods with any foolhardy person who asks nicely.  In short, they make me cranky (not unlike Ikea, to which, by degrees, we are coming).  After musing on these thoughts, I concluded that what I need for my kitchen is a stove hood cover, like so:

 
Or, like so:

 
As far as I know, these did not exist 100 years ago.  However, they do coordinate with antique woodwork, and they spare me the hassle of trying to decide which contemporary hood irritates me least.  And obviously I could make something like that (with patience and lots of sanding and caulk) for very little money.  But first, I need to get exact measurements of the stove hood it needs to go over.  Which probably means I need to get my hands on one. 

Which brings me back to Ikea.  Currently my kitchen doesn't have ductwork for an exterior-venting hood.  Therefore, I decided I wanted a convertible hood: I can install it as ductless, and if we (or a later owner) decide that ducted is the way to go, then we can hire someone to knock some holes in the walls and ceiling).  Ikea seemed to have one of the best options:


It is convertible; it comes with the charcoal filter for non-ducted use; it is a good price; and it has a pretty high CFM rate for the price-point.  But its most important feature is those two little black knobs.  See how they're on almost the very bottom of the unit?  If I measure my hood cover right, it will be possible to reach them with the hood cover on.  Obviously, that is essential. 

I should note here that Ikea offers only two under-cabinet hoods (cabinet not included, by the way).  The website shows two.  The showroom has two.  The product index on the computers in the stock area has two.  One is ductless only (and costs a good bit less.  And comes only in white).  The convertible one comes only in stainless steel.  That's what I bought.  And I picked up its nice box and I put it in the car and took it home. 

Then, on Monday, I opened the box so I could see whether the advertised length included the width of the knobs, and start sketching measurements for my stove hood cover.  And what did I find?  I found this:


The only stainless steel under-cabinet vent hood Ikea advertises has a curved front, and does not angle in at the sides.  But the one in my box is different.  And the controls are on the top, which is clearly not the case with the hood on Ikea's site OR the hood in its showroom!  AND my hood had a dent across the front.  That's not acceptable, but it could happen without them knowing if the box were struck (of course, the box was in perfect condition).  AND when you look at the top, where there are mounting screw holes, one of them is bent out - in a way that could only happen if someone tried to install it and used too much force.  There's also a scratch by one of the screw holes. 

So they sold me a used hood (or at least a returned one) - in a new box.  When it was not in new condition.  They also sold me a hood THAT THEY DON'T CARRY, and therefore that I can be very sure I didn't order.  I'm willing to bet this is the previous-generation model of their under-cabinet hood.  Which would make the mistake innocent IF they still advertised this on their website, at the same price as the new version, and they switched the boxes.  But that's not what's happened here.  They discontinued an item, replaced it in all their literature with a newer, nicer item, and have the audacity to keep stock in their warehouses to supply the old item to unsuspecting customers at the new item price.  If they wanted to offer me 25% off to buy last year's model, fine (I would have said no because I need the controls to be lower, but I wouldn't have minded them asking), but they did not ask.  If they don't advertise that product, they should not stock it. 

So while I have my receipt and can go and exchange my hood for the correct one, I believe a much sterner correction is in order here.  Because this is not a stockist error - it's a corporate error.  And I am very, very cranky about it. 

The moral of the story (and others have said this before, and I didn't listen, but maybe you will): OPEN THE BOXES before you even get them to the loading area.  Bring packing tape if you have to to re-pack them for the car; but open them, open them, open them! 

That is all. 

Flubber

We had "THAT" family home evening tonight. You know the one about being aware of creepy people and the creepy things that can be found on the computer, and body parts. Yeah, I am too immature for that kind of stuff but it is important to keep them safe. It all went really well considering the context.  Anyway, to lighten things up afterwards we made Flubber. There are recipes for this stuff all over, but I thought I would add my own to the mix. If you don't know what flubber is, I can only describe it as a mixture of slime, playdough, and silly putty. The kids love this stuff and frankly, so do I.  I have been fiddling with it so much tonight my thumbs are getting sore. 


Recipe
1 Cup Elmer's Glue
1 1/3 Cup of Warm Water
2 tsp. Borax (found in the laundry detergent aisle)
Food Coloring
Glitter (optional)
Mix glue, glitter, and 2/3 cup of water in bowl. In a seperate bowl mix 2/3 cups of water and Borax and food coloring. Combine. The GOO will set in about 1 minute.

The Princess & The Future President

We went to a Romney Rally this morning and look who got up close and personal with Governor Romney...